Learning Objectives
- Be able to articulate integer instructions.
- Be able to write simple assembly programs.
- Be able to load and store from and to memory.
- Be able to create labels and jump to them conditionally or unconditionally.
- Be able to create and call functions using standard operating procedures.
- Be able to use MARS's system calls to print and read data.
- Be able to use directives to create strings and other data.
- Understand and use the different executable sections.
- Be able to use the stack for local storage.
- Be able to use saved and temporary registers.
- Understand what destroying registers means and what to do about it.
- Understand how branches are implemented in the architecture.
In this lecture and in this course, we will be using MARS (MIPS Assembler and Runtime Simulator), which you can download here: http://courses.missouristate.edu/kenvollmar/mars/download.htm
Assembly
.text
.globl main
main:
    add $a0, $a0, $a1
    jr  $ra
The code above shows three different pieces of the assembly language. The words that start with a '.' are called directives. Those words that end with a ':' are called labels. Everything else, including add and ret are called instructions.
Directives and labels are for you (the programmer) and to change how the assembler functions. Instructions are encoded directly into machine code by the assembler. So, the important part about learning assembly is to build your vocabulary--that is, learn the instructions and what they do. Remember, everything that C++ does in the end is converted into assembly.
Understanding Assembly
When we write assembly, we become the C++, WE become the order of operations. Let's take a look at a simple C++ statement and see what we can do to convert it into assembly.
int i = 10;
int j = 20;
int k = 30;
int result = i + j * k;
When we look at the code above, we can see that we need to multiply j and k together first, then add that product to i to get the result. The order of operations was handled by C++ for us, but now that we're instructing the processor ourselves, WE are now the order of operations.
li $t0, 10
li $t1, 20
li $t2, 30

mul $t3, $t1, $t2
add $t4, $t3, $t0
This code above, we use li (load immediate) to load the values 10, 20, and 30 into three separate registers, t0, t1, and t2 respectively. These registers have specific names, so we can't just name them i, j, and k like we could in C++. We know that 10 + 20 * 30 will give us 610, so let's see what we get.
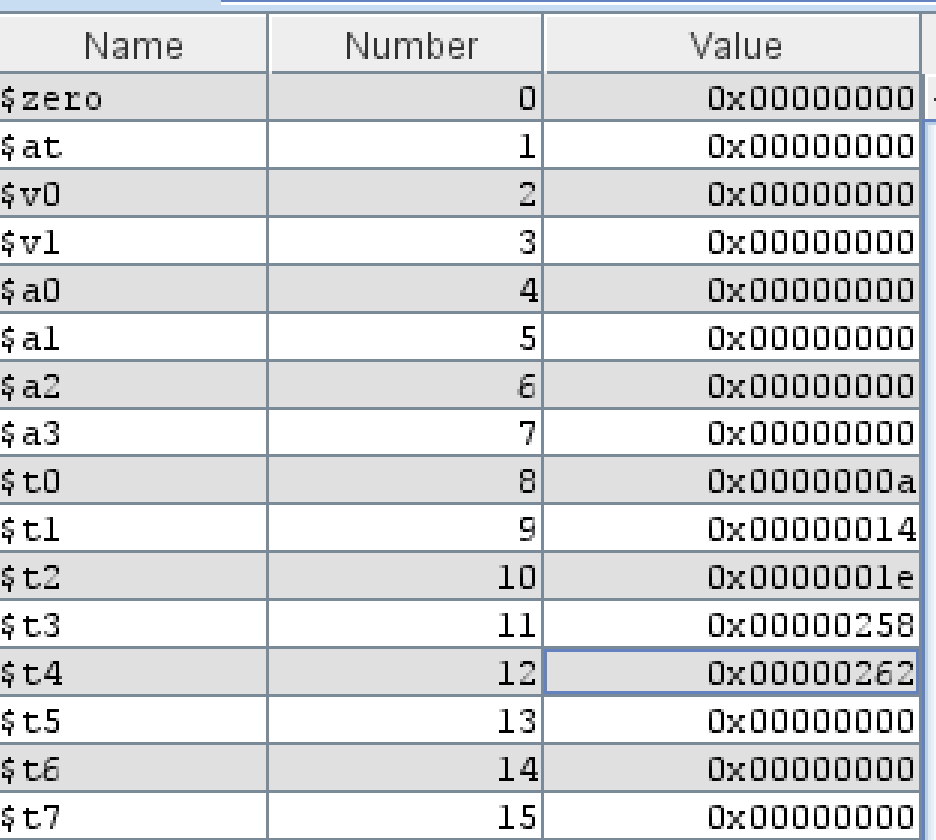
Our result is $t4, and the value is 0x262, which is \(2\times 16^2 + 6\times 16^1 + 2\times 16^0=610_{10}\). Notice that we executed the mul (multiply) instruction first. In assembly, the order of operations is whenever that instruction gets executed, so we must be the arbiter.
Registers
Registers are very small pieces of memory inside of the CPU. For our MIPS architecture, these are 32 bits a piece. Therefore, our MIPS is a 32-bit machine. On the Hydra and Tesla machines, each register is at least 64 bits, so our Hydra and Tesla labs machines are 64 bits.
MIPS has several registers which can be address by number, such as $0, $1, $2, or by its name, such as $a0, $t0, $s0. Here are the registers and their purpose in MIPS.
| Register Name | Usage |
|---|---|
| $zero | Always the value 0. If you write to this register, the write is discarded. |
| $v0, $v1 | The "return" registers. C++ and C only use $v0. These are NOT preserved across function calls. |
| $a0 - $a3 | The "argument" registers. These are NOT preserved across function calls. |
| $t0 - $t9 | The "temporary" registers. These are NOT preserved across function calls. |
| $s0 - $s7 | The "saved" registers. These ARE preserved across function calls. You must return them the same way you found them. |
| $k0, $k1 | The "kernel" registers. Do not use these. |
| $gp | The "global pointer". Do not use this. |
| $sp | The "stack pointer". Points to a memory address for local storage. |
| $fp | The "frame pointer". You can use this in conjunction with $sp to mark a stack frame. |
| $ra | The "return address" register. Typically stores the return address for a function call. There is only ONE of these, so nested function calls must save this! |
The "use" of these registers are their recommended use. You have full control over these registers, but if you put a value that MIPS is not expecting, it could have unintended consequences!
What to look for
C++ handled data types (signed and unsigned, integral, and float), data sizes, and order of operations for us. We as the assembly programmer are now required to ensure that our data sizes are correct. MIPS is known as a load/store architecture. Notice that we could load small immediates, but we can only act upon immediates or registers. What about memory? In MIPS, we have to load to get a value from memory into a register or store to put a value from a register into memory.
| Instruction | Size (bytes) | Description |
|---|---|---|
| sb $t0, 8($sp) | 1 (byte) | Stores the value of $t0 into ($sp + 8) |
| sh $t0, 8($sp) | 2 (halfword) | Stores the value of $t0 into ($sp + 8) |
| sw $t0, 8($a0) | 4 (word) | Stores the value of $t0 into ($a0 + 8) |
| lb $t0, 8($t7) | 1 (byte) | Loads a value from ($t7 + 8) into $t0 |
| lh $a0, 10($t1) | 2 (halfword) | Loads a value from ($t1 + 10) into $a0 |
| lw $a0, 0($s0) | 4 (word) | Loads a value from ($s0 + 0) into $a0 |
The table above has some examples of how to use them, however there are essentially five parts: (1) load vs. store (l vs. s), (2) data size (b, h, or w), (3) source (store) or destination (load) register, (3) offset (can be 0), (4) destination (store) or source (load) register. The register for (4) must contain a valid memory address, or the instruction will cause the program to crash.
The lb and lh instructions will take a 1-byte or 2-byte value, respectively from memory and put it into a 32-bit register. Therefore, it needs to widen the value. These instructions will sign-extend the value. So for lb, it takes bit index 7 (the sign bit) and extends it 24 more times to make a full 32-bit value. The lh instruction takes bit index 15 (the sign bit) and extends it 16 more times to make a full 32-bit value.
Sometimes we want to zero-extend a value instead. So, instead of duplicating the sign bit, a widened value is simply padded with leading zeroes. We can modify the behavior by adding a 'u' (for unsigned) at the end of the load instructions.
| Instruction | Description |
|---|---|
| lbu $t0, 0($sp) | Load a byte from memory, and zero extend *($sp + 0) into $t0. |
| lhu $t0, 0($sp) | Load a halfword (short) from memory, and zero extend *($sp + 0) into $t0. |
We obviously don't need an sbu or shu or even a lwu because each store stores exactly 8 or 16 bits into memory. The lwu is not necessary because we cannot widen a 32-bit value (a word) since the registers are only 32-bits. For a 64-bit machine, we would have a lwu to widen a 32-bit value into a 64-bit register.
Common Instructions
| Instruction | Operation |
|---|---|
| add $t0, $t1, $t2 | $t0 = $t1 + $t2 |
| addi $t0, $t1, -100 | $t0 = $t1 + -100 |
| sub $t0, $t1, $t2 | $t0 = $t1 - $t2 |
| mul $t0, $t1, $t2 | $t0 = $t1 * $t2 |
| div $t0, $t1, $t2 | $t0 = $t1 / $t2 |
| rem $t0, $t1, $t2 | $t0 = $t1 % $t2 |
There are other instructions besides these, but these are your common integer instructions. Notice that there is only addi (add immediate). MARS will give us a subi, but it is an addi with a negative immediate. The immediate (-100 in the case above) is encoded into the instruction itself. Each instruction consumes exactly 32 bits (4 bytes). The majority of those bits are taken by the instruction and registers themselves, so that leaves little room for the immediate. Therefore, this instruction is only useful for small immediates.
| Instruction | Operation |
|---|---|
| sll $t0, $t1, 10 | $t0 = $t1 << 10 |
| sllv $t0, $t1, $t2 | $t0 = $t1 << $t2 |
| srl $t0, $t1, 10 | $t0 = $t1 >> 10 (logical) |
| srlv $t0, $t1, $t2 | $t0 = $t1 >> $t2 (logical) |
| sra $t0, $t1, 10 | $t0 = $t1 >> 10 (arithmetic) |
| srav $t0, $t1, $2 | $t0 = $t1 >> $t2 (arithmetic) |
| or $t0, $t1, $t2 | $t0 = $t1 | $t2 |
| ori $t0, $t1, 10 | $t0 = $t1 | 10 |
| xor $t0, $t1, $t2 | $t0 = $t1 ^ $t2 |
| xori $t0, $t1, 10 | $t0 = $t1 ^ 10 |
| and $t0, $t1, $t2 | $t0 = $t1 & $t2 |
| andi $t0, $t1, 10 | $t0 = $t1 & 10 |
| not $t1, $t2 | $t1 = ~$t2 |
| neg $t1, $t2 | $t1 = -$t2 |
All of the logical operations that we need are supported above. Some of the instructions above are called pseudoinstructions, and the assembler will convert them to the actual instruction. For example, not $t1, $t2, is the same as xori $t1, $t2, -1. In the reduced-instruction-set-computer (RISC), we have a limited number of instructions, so the assembler needs to choose the operation that might not be exactly what you wanted, but it's equivalent.
Jumps and Branches
We've seen how to make simple integer and logical instructions perform their magic, but a lot of times we want to conditionally or repeatedly execute code. These are if statements and loops in C++. In MIPS, we have jumps and branches. A branch can be thought of as a condition, where as jumps are unconditional. As the name implies, it allows us to go somewhere else. Otherwise, the CPU will just execute the very next instruction in sequence.
This is where labels are important. A jump or branch instruction needs to know where to go to. A label is just an easy name we give a memory address. When we jump or branch, we can provide the label instead of hard coding the memory address, and the assembler takes care of the rest!
if (t0 < t1) {
    t2 = 100;
}
else {
    t2 = -100;
}
Who know what this code actually does, but let's see how we can convert it into assembly. I used variable names t0, t1, and t2, but remember, variables are NOT registers! We are required to make sure that each register contains the proper value of each variable.
## if (t0 < t1)
   bge t0, t1, else_statement
# If we get here, t0 < t1 (t0 is NOT GE (greater-than-or-equal-to) t1)
   li $t0, 100
   j if_done
## else
else_statement:
   li $t0, -100
if_done:
Let's see what the code above is doing. Notice we have labels (words ending with colons ':'). These mark memory addresses so that when we branch or jump, we can provide a name rather than an address. This is helpful because the more instructions we write, the memory addresses change!
In the code above, I took the negative approach. The branch instruction (bge) stands for branch-if-greater-than-or-equal-to. Notice that that is the opposite of t0 < t1. So, we're telling MIPS to go to the else statement if t0 >= t1. If the branch is taken, we jump to the label else_statement, otherwise, the branch instruction does nothing and we execute the instruction directly underneath it.
So, why the j if_done? A label just marks a memory address. Like a switch statement in C++, it doesn't stop code from executing. So, without the if_done, we would go right into the else statement and execute the code inside of the else statement even when t0 is indeed less than t1. That's not what we want. So, the jump instruction jumps over the else code and completes the if statement.
We can use the same branches and jump to execute a for loop. It is helpful for us to know how a for loop works, when pieces of a for loop execute, and how many times.
for (t0 = 0;t0 < 100;t0++) {
      t1 += 1;
}
   li $t0, 0  # t0 = 0
   li $t1, 0
   li $t2, 100
for_loop_head:
   bge $t0, $t2, for_loop_end   # t0 < 100 (we use the negative)
   addi $t1, $t1, 1    # t1 += 1
   addi $t0, $t0, 1    # t0++
   j for_loop_head  # loop after step
for_loop_end:
Branch instructions require two registers and a label. Therefore t0 < 100 cannot be executed directly. Instead, we must use a register to hold 100.
As we can see in the for loop, we initialize the iterator ($t0) ONCE and only once. Then, just like in a for loop, we check the condition before doing anything. Again, I took the "negative" view. In a for loop the condition is "if it's true run the loop". Ours is "if the condition is false, break the loop". We're saying the same thing except ours tells MIPS when to break the loop. Remember, when a branch is NOT taken, it just executes the very next instruction. In our case, that's $t1 += 1. We can use addi since the immediate is small. Then, as with a for loop, the step (t0++) comes next. After the step, we check the condition again. There's the loop!
| Branch Instruction | Operation |
|---|---|
| beq $t0, $t1, here | if (t0 == t1) goto here; |
| bne $t0, $t1, here | if (t0 != t1) goto here; |
| blt $t0, $t1, here | if (t0 < t1) goto here; |
| ble $t0, $t1, here | if (t0 <= t1) goto here; |
| bgt $t0, $t1, here | if (t0 > t1) goto here; |
| bge $t0, $t1, here | if (t0 >= t1) goto here; |
As with many other instructions, some of the instructions above are pseudo-instructions. In MIPS, we really only have beq and bne. The assembler figures out how to do the other ones, such as blt and bge. blt and bge will check for negative numbers, so the sign-bit does NOT contribute to the magnitude. This means that blt and bge will work with signed values. However, we still have unsigned values. In these cases, we can use the 'u' variants of blt and bge as below.
bgtu $t0, $t1, label
bgeu $t0, $t1, label
bleu $t0, $t1, label
bltu $t0, $t1, label
There is no such thing as bequ or bneu since these will compare bit-by-bit; however, all inequalities (blt, ble, bgt, bge) all have 'u' variants.
It might be more helpful to envision a for loop as a while loop. Here's an example of the for loop above as a while loop. See if you can match the instructions in the assembly above with what's going on with the loop below.
t0 = 0;
while (t0 < 100) {
    t1 += 1;
    t0++;
}
I ALWAYS recommend first writing your logic in C++ and then translating to assembly. You are probably not comfortable with assembly and developing logic just complicates the issue. Even I will write more complicated code in C++ first, compile it, test it, and then translate into assembly. Doing all of the above in assembly is complicated, even for the pros!
Integer Comparisons
A branch condition can be implemented by subtracting the two operands and seeing what comes out. These can be summed up using the flags NZCV, which stand for negative, zero, carry, and overflow, respectively. If we subtract two numbers and the result is negative, that means that the first number is smaller than the second. If we subtract two numbers and the result is zero, that means both numbers were equal, analogously, if we subtract two numbers and the result is not zero, that means the two numbers were not equal.
In MIPS, we only have three comparisons that we can do, equals, not equals, and less than. For the branches, we only have equals and not equals (bne and beq). For less than, we can use the SLT (set-on-less-than) instruction. The rest of the branch instructions are pseudo-instructions that implement a combination of slt and bne/beq.
In some architectures, flags are stored after a comparison and can be referred to later. As you can see with MIPS, the branch instruction itself will make the comparison and decision to go to the given memory label.
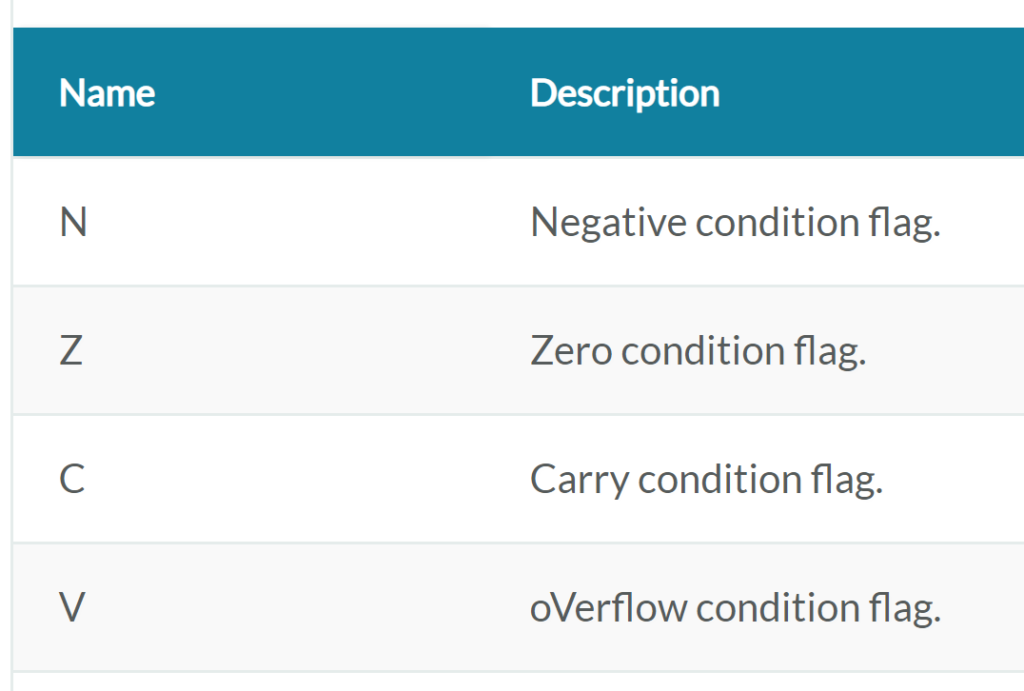
NZCV can come with different names, such as SF (sign flag), ZF (zero flag), CF (carry flag), and OF (overflow flag) in the Intel/AMD architecture. The point of this is to see that you can use a mathematical operation to compare two numbers. Since our architecture deals with numbers, hopefully it is becoming clear(er) how conditions can be implemented.
To see these conditions in action, we can see different ways to represent these flags to give a certain conditional outcome.
| Condition | Flags |
|---|---|
| Equals | Z = 1 |
| Not Equals | Z = 0 |
| Less Than | N = 1 |
You can see this in action. Recall that the conditions are set by looking at the result after subtraction--the difference.
\(10 - 2 = 8\)We can see Z = 0 (not equals) and N = 0 (not less than). Since it is not equals and not less than, it therefore must be greater than.
\(2 - 10 = -8\)We can see Z = 0 (not equals) and N = 1 (less than). This means that 2 is less than 10.
To implement this in hardware, we can hook the negative flag directly to the most significant bit of our result. Recall that this is the sign bit. Then we can test all of the digits to see if they are zero for the zero flag.
Executable Sections
Notice that we write .text at the top of our assembly code. This is because executable programs have different sections where we store our data. The MARS simulator only supports two out of the four, but here are the sections and their use. The ones supported by MARS are in bold.
| Section Directive | Description |
|---|---|
| .text | CPU instructions are called the "text" of an executable. |
| .data | Global, initialized variables are in the data section. |
| .rodata | Global, initialized constants are in the rodata section. |
| .bss | Global, uninitialized variables are in the bss section. The operating system sets all of these to 0 during execution, so global uninitialized variables are NOT garbage! |
These sections require a label and a directive. So, we can create data using the following directives:
.data
   data_as_bytes: .byte 100, 200
   data_as_halfwords: .half 100, 200, 300
   data_as_words: .word 100, 200, 300
   data_as_a_string: .asciiz "This is a string\n"
   data_as_a_sequence_of_chars: .ascii "ABCDEFG"
You can see from the example above that we specify the data size as .byte, .half, or .word for 1, 2, and 4 bytes, respectively. These directives require a value. We can create more than one piece of data by adding commas. These will be in contiguous memory. However, how do we get these values? We can use the pseudo-instruction called 'la' for load address.
.data
   output: .word 123456
.text
main:
    li $v0, 1  # print integer
    la $a0, output # load ADDRESS of output
    lw $a0, 0($a0) # load value FROM address of output
    syscall  # print 123456
The code above will print 123456 to the screen. Notice that we first have to load the address of the "output" label. We cannot just directly dereference the value. Instead, we load the address, then do a lw (load-word) to dereference the memory address into the actual value.
Recall that these are global variables! Just like in C++, we do not want to rely on these variables. So, only use globals VERY sparingly!
To see how we can use a global variable as an array of data, we can create an uninitialized array of bytes and then store into them using the .space directive. This requires a parameter which is the number of bytes that you want to reserve for the given label.
.data
   storage: .space 16
.text
main:
   la $t0, storage
   li $t1, 100
   sw $t1, 0($t0)
   addi $t1, $t1, 100
   sw $t1, 4($t0)
The code above demonstrates using a label as storage. We can grab the address and use the offset of a store instruction to move within it. Notice that we wrote .space 16. This means that we reserved 16 bytes. It DOES NOT mean that we reserved a space and put the value 16 in there. Instead, the memory allocated using .space must be considered garbage since it is uninitialized. MARS will probably make it all zeroes, but do not assume that!
Local Data Storage
Notice that all of the sections above refer to global data. This is because local storage is stored on the stack. The stack is setup for us whenever we execute a program. How do we refer to the stack? There is a special register ($sp) called the stack pointer. This is a memory address where we can store and load from. The stack starts at the higher memory addresses and grows towards the lower memory addresses. We are allowed to use AT or below $sp. If we want to allocate memory, we subtract the number of bytes from the $sp. However, since we're responsible for the stack, we MUST put it back the same way we found it by adding back to it. We don't have to clear it or restore the values, but we do have to put $sp back.
In C++, the stack is used for all variables that are not global. C++ will automatically move the stack pointer around. This is helpful (and necessary) when calling functions.
addi $sp, $sp, -8
li $t0, 100
li $t1, 200
sw $t0, 0($sp)
sw $t1, 4($sp)
addi $sp, $sp, 8
Above, we allocated 8 bytes by subtracting from the stack pointer, which is two words. Since $sp points to a memory address, we can simply use load and store to read or write values on the stack. This is called a stack frame. Since we allocated 8 bytes, we are allowed to use $sp + 0, $sp + 1, ... $sp + 7 (remember 0-based indices).
The stack pointer is required to be aligned by 8 bytes, which is a fancy term of saying the stack pointer must be a multiple of 8. Therefore, even if we need 1, 2, or even 4 bytes, we must still subtract 8. In fact, anything we subtract from $sp must be a multiple of 8. If we need 12 bytes? We subtract the nearest multiple of 8, which is 16.
Functions
Functions are just a fancy term for a label. The "hard" part is remembering how arguments are passed to a function and how data is returned. It's not that hard and MIPS makes it much easier.
The $a0 through $a3 registers are a because they are called the argument registers. So, the first argument goes into a0, the second into a1, the third into a2, and the fourth into a3. What about returns? The return value goes into $v0.
Nothing forces us to use this policy, but it is standard operating procedure called the application binary interface or ABI. This is a fancy term for the rules we agree upon to make functions work across programming languages.
int add_one(int value) {
     return value + 1;
}
int main() {
    int result = add_one(2);
    return 0;
}
A fairly simple example. So, we want to call add_one with an argument of 2. Take note of the data types!
j main
add_one:
    addi $v0, $a0, 1
    jr $ra
main:
    li $a0, 100
    jal  add_one
    # $v0 will be 101 here
We start by executing j main. This is because MARS starts at the top of our assembly code and works its way down. Normal executables don't do this. Instead, normal executables start at a label called _start, which eventually works its way to int main().
When we're in main, we have to set up the parameters before we call add_one. The instruction jal stands for jump-and-link. This instruction will put the memory address under the jal instruction into the $ra (return-address) register. This allows the function to find its way back to int main(), otherwise, how do we know which memory address to go back to?
Destroying Registers
Per the same standard that says $a0 through $a3 get our arguments, these are also considered scratch registers. In fact, all $t (temporary) and $a (argument) registers are considered scratch registers. This means that when we call a function, that function is permitted to destroy whatever value is inside any temporary or argument register. Therefore, if we have important data inside of an a or t register, when we call a function, we MUST consider it destroyed.
Saved Registers ($s0..$s7)
This is where the saved registers come into play. These registers per the standard are required to have the same value before AND after a function call. We are still allowed to use them, but we must use the stack to store the original value of any saved register before we use them. Then, before we return from our function, we're required to load the old value back.
You will usually use a saved register if you find yourself in a loop loading and storing over and over again. Recall that each register is exactly 32 bits (4 bytes), so we know how much stack space we need by adding all of the register we need to use together. Remember, the stack must be a multiple of 8!
Also, we only have ONE $ra register. If we need to call another function, we will use the jal (jump-and-link) instruction. However, this instruction will destroy what's already in $ra! Therefore, we're required to save it too only when we call another function.
my_function:
   addi $sp, $sp, -16
   sw $s0, 0($sp)
   sw $s1, 4($sp)
   sw $s2, 8($sp)
   sw $ra, 12($sp)
   li $s0, 100
   li $s1, 200
   li $s2, 300
   jal some_function_label
   # We can assume $s0, $s1, and $s2 are still 100, 200, and 300.
   lw $s0, 0($sp)
   lw $s1, 4($sp)
   lw $s2, 8($sp)
   lw $ra, 12($sp)
   addi $sp, $sp, 16
   jr $ra
Notice that we can use the offset to identify the register. We subtract 16 bytes from the stack because we're storing 4 registers and \(4\times 4 = 16\). Even if we were only storing 3 register (12 bytes), we would still need 16 bytes from the stack since it is required to be a multiple of 8.
Since we don't know what's in any of the saved registers and we don't know the exact size of $ra, we must always store and load the maximum size, which is a word (sw and lw). That makes guessing obsolete at least!
System Calls
This is just for MARS and is not a MIPS thing. If we want to read integers or print them to the screen, we would usually use printf or cout. These functions eventually make a system call to the operating system to get the output. In MARS, we have to use system calls, which can be found in "Help > System Calls". I will outline just the most useful below.
Here are the steps to make a system call in MARS.
- Load system call number in $v0.
- Set the parameters (see tables below).
- Execute syscall instruction.
- Read return values (if applicable)
An example of the steps above can be seen below. Notice we execute a print instruction for whatever is inside of the $t0 register. We actually make the system call using the syscall instruction.
li $v0, 1             # syscall #1 is print integer
add $a0, $t0, $zero   # This is the same as move $a0, $t0
syscall               # syscall instruction issues the system call
Output
| System Call | Value of $v0 | Parameters |
|---|---|---|
| Print integer | 1 | $a0 is integer to print |
| Print float | 2 | $f12 is float to print |
| Print double | 3 | $f12 is double to print |
| Print string | 4 | $a0 is address of null-terminated string to print |
So, following the procedures, we can print an integer by putting the system code in $v0, which for print integer is 1, or for print string is 4.
.data
   output: .asciiz "Hello World\n"

.text
main:
   li $v0, 4
   la $a0, output
   syscall
In the code above, we use li to put the system call #4 (print string) into $v0. Then we use la (load address) to load the address of the output string into $a0. We then make the system call by using the syscall instruction. Look at the window at the bottom of MARS, we can see:
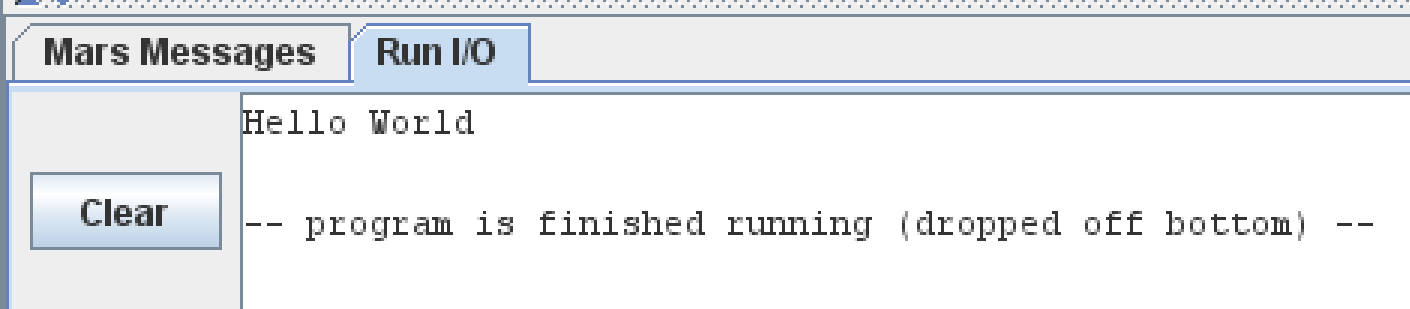
Notice that I used .asciiz in the .data section to create the string. In C++, string literals go in the .rodata section, but MARS doesn't have one. Also, .asciiz means "use the ASCII table for characters and put a Z (zero) at the end of it". C-style strings don't have a length. We know the length of a string by counting until we hit a 0--this 0 is called the null byte. This is why we have .asciiz. If we don't want a zero to automatically be put into our string, we can use just .ascii. The null byte (0) is why we call strings null-terminated. Since we keep writing the string until we hit that null byte, which is 0.
Unfortunately, we don't have the power of printf. So, if we want to print strings and integers, we need two different system calls. The following example shows how to print an integer.
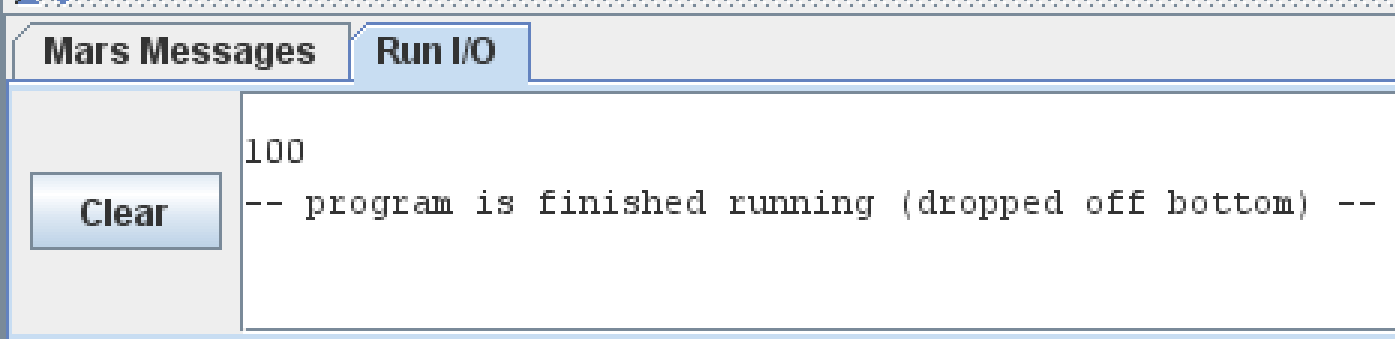
.text
main:
   li $v0, 1
   li $a0, 100
   syscall
As you can see, we put the value 1 into $v0 for the "print integer" system call, and then we put whatever value we want to print in $a0. This produces the following.
Input
Just like printf and cout, we have scanf and cin. Unfortunately, we don't have that power with MARS. So, we need to use the input system calls as summarized below.
| System Call Function | Value of $v0 | Returns |
|---|---|---|
| Read integer | 5 | $v0 contains integer |
| Read float (32-bits) | 6 | $f0 contains float |
| Read double (64-bits) | 7 | $f0 contains double |
| Read string | 8 | $a0 is input buffer which is filled with the string. $a1 is the maximum size of the buffer. |
An example of using the read-based system calls above is below.
.data
    prompt: .asciiz "Enter an integer: "
    output: .asciiz "You entered the integer: "
.text
main:
   # First, print the "Enter an integer" prompt
   li $v0, 4
   la $a0, prompt
   syscall
   # Now wait for the user to input an integer
   li $v0, 5
   syscall
   # Move $v0 (the integer) out of the way
   move $s0, $v0
   # Output the "You entered the integer" prompt
   li $v0, 4
   la $a0, output
   syscall
   # Finally, move $s0 into $a0 and print the actual integer in $a0
   move $a0, $s0
   li $v0, 1
   syscall
The code above first prompts the user to enter an integer. When they do and press ENTER, the system call puts that integer into $v0. We then move that into $a0 so that we can print it using the print integer system call.

You might see the move instruction. This is yet another pseudo-instruction that resolves to using the add instruction. So, move $t0, $s0 is the same as add $t0, $s0, $zero. This is why the syscall help in MARS uses add $a0, $t0, $zero instead of move $a0, $t0. They do the same thing, but the add instruction is real.
Yes, there is a register called $zero. This can be used to load a value of 0 always. If we write to this register, the value is discarded. The zero register is hardwired to 0 and cannot be changed.
"Dropped off Bottom"
The MARS simulator will end your program whenever there are no more instructions to execute. This is NOT how an actual system works. Instead, when we return from int main(), C++ will make a request to the operating system to close your program. However, for purposes of this course, whenever you want to quit your program, just jump to the very end. I always make a label called "end" that is at the bottom of each program.
In normal situations, we would use the exit (or exit2) system calls to tell the operating system to terminate our process.