Learning Objectives
- Understand how graphics function in Python.
- Be able to display lines and text using graphics.
- Be able to handle mouse events using graphics.
Introduction
There might come a time where you want to display you own set of graphics rather than relying on a particular software package, such as Matplotlib. Sometimes visualizing data your way makes all the difference in the world.
We will be using tkinter which gives us drawing primitives, such as draw a line from x1,y1 to x2,y2. We can convert our data into anything we want now that we have the full power of graphics at our disposal.
Custom Graphics
There are probably hundreds of graphics libraries out there for Python. However, we will be using one that draws graphics at a fairly low level called Tcl/Tk through a module called tkinter. We will import this library so that we can draw graphics to the screen.
We start by importing tkinter. That's a mouthful, so we usually shorten it to just tk by:
import tkinter as tk

root_window = tk.Tk()
This will give us a blank screen with default sizes. We need to have a region on which we can draw. This is called the root window:
import tkinter as tk
root_window = tk.Tk()
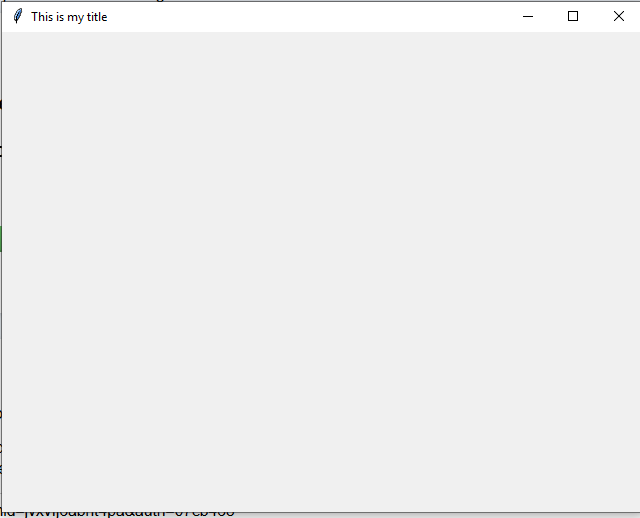
root_window.geometry("640x480")
root_window.title("This is my title.")
As you can see with the code above, we create the root window by invoking tk.Tk(), which is a class. That root window takes the defaults, so we can specify the width and height by using the member geometry. Notice that this takes a string with an 'x' in between. This is in the format widthxheight. This means that our window will be 640 pixels wide by 480 pixels tall.
Our code above produces a window that looks as follows:
Drawing Graphics
We are given a primitive toolkit in which we can draw text, lines, circles, and polygons. There are widgets that we can place on the window, such as a text box, a dropdown box, and so forth.
We don't draw directly on the root window, instead we draw on a canvas, which can be created as follows:
import tkinter as tk

root_window = tk.Tk()
root_window.geometry("640x480")
root_window.title("This is my title.")

canvas = tk.Canvas(root_window, width=640, height=480)
canvas.pack()
The canvas is a drawable region of a window. Notice that we specify the window and the width and height. This allows us to have multiple canvases on a window. In our case, we take up the entire width and height with our canvas. The canvas.pack() portion makes sure that the window resizes around the canvas size. We generally don't use pack and geometry at the same time, but in our case above, it makes sure that the entire window is embodied by the canvas.
Drawing Primitives
Primitive drawing is done through the canvas through several member functions. For example, we can draw a rectangle using the following code:
import tkinter as tk
root_window = tk.Tk()
root_window.geometry("640x480")
root_window.title("This is my title.")
canvas = tk.Canvas(root_window, width=640, height=480)
canvas.pack()
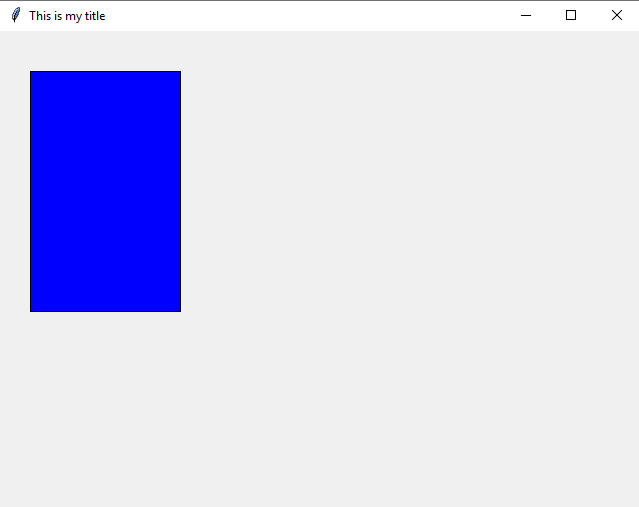
canvas.create_rectangle(30, 40, 180, 280, fill="blue", tags="mybluerect")
We now create a rectangle starting at top-left pixel x=30 and y=40 and ending at bottom-right pixel x=180 and y=280. We also tell the canvas to draw a blue rectangle by specifying the fill. The tag allows us to refer to this rectangle in the future in case we want to modify it or even delete it later. This code produces the following on the screen:
Object Stacking
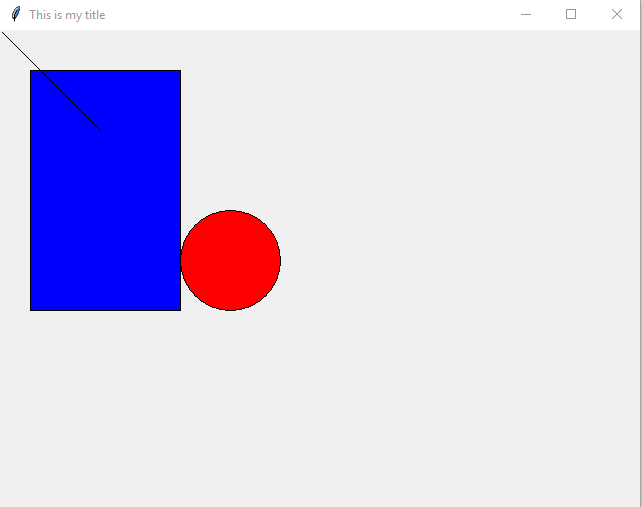
The order in which we create our objects will be back to front. So, the last object we create will be on top of the first objects we created. For example, I create a line and a circle below, but see how the line overlaps the region of the blue rectangle.
import tkinter as tk

root_window = tk.Tk()
root_window.geometry("640x480")
root_window.title("This is my title.")

canvas = tk.Canvas(root_window, width=640, height=480)
canvas.pack()

# This creates a rectangle whose top-left corner is at x,y = 30, 40 and whose bottom-right corner is x,y = 180, 280.
# The fill is whatever you want the color to be inside of the rectangle.
# The "tags" is a name we can refer to this rectangle by in case we want to delete it.
canvas.create_rectangle(30, 40, 180, 280, fill="blue", tags="mybluerect")
# Create a straight line from x1,y1 = 0,0 to x2,y2 = 100,100
canvas.create_line(0, 0, 100, 100, tags="straightline")
# Draw a circle (an oval with equal width and heights). Remember the 180 is x1, the second 180 is y1, the 280 is x2, and the second 280 is y2
canvas.create_oval(180, 180, 280, 280, fill="red", tags="theoval")
The code above produces the following output:
Deleting Objects
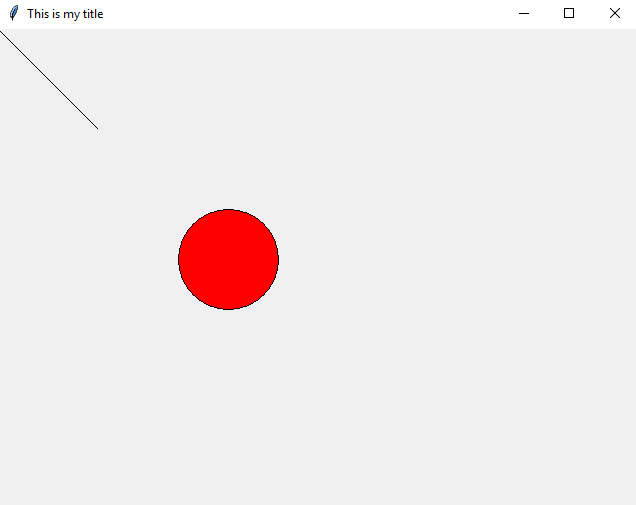
Recall that we use the tag so that we can refer to an object later. The following code deletes the blue rectangle by specifying the tag.
import tkinter as tk

root_window = tk.Tk()
root_window.geometry("640x480")
root_window.title("This is my title.")

canvas = tk.Canvas(root_window, width=640, height=480)
canvas.pack()

# This creates a rectangle whose top-left corner is at x,y = 30, 40 and whose bottom-right corner is x,y = 180, 280.
# The fill is whatever you want the color to be inside of the rectangle.
# The "tags" is a name we can refer to this rectangle by in case we want to delete it.
canvas.create_rectangle(30, 40, 180, 280, fill="blue", tags="mybluerect")
# Create a straight line from x1,y1 = 0,0 to x2,y2 = 100,100
canvas.create_line(0, 0, 100, 100, tags="straightline")
# Draw a circle (an oval with equal width and heights). Remember the 180 is x1, the second 180 is y1, the 280 is x2, and the second 280 is y2
canvas.create_oval(180, 180, 280, 280, fill="red", tags="theoval")

canvas.delete("mybluerect")
Notice that we specify the tag in the delete member function to remove the object. We can also clear the screen by writing "all". This is a special tag that refers to all objects in the given canvas. The code above produces the following--take note that the big blue rectangle is now gone.
Drawing Text
Text can be somewhat complicated due to point sizes, font types, and families. However, we can specify text by using create_text.
import tkinter as tk
root_window = tk.Tk()
root_window.geometry("640x480")
root_window.title("This is my title.")
canvas = tk.Canvas(root_window, width=640, height=480)
canvas.pack()
# This creates a rectangle whose top-left corner is at x,y = 30, 40 and whose bottom-right corner is x,y = 180, 280.
# The fill is whatever you want the color to be inside of the rectangle.
# The "tags" is a name we can refer to this rectangle by in case we want to delete it.
canvas.create_rectangle(30, 40, 180, 280, fill="blue", tags="mybluerect")
# Create a straight line from x1,y1 = 0,0 to x2,y2 = 100,100
canvas.create_line(0, 0, 100, 100, tags="straightline")
# Draw a circle (an oval with equal width and heights). Remember the 180 is x1, the second 180 is y1, the 280 is x2, and the second 280 is y2
canvas.create_oval(180, 180, 280, 280, fill="red", tags="theoval")
canvas.delete("mybluerect")
# The font is specified by a tuple which is (name, size). In the following case, we're drawing text
# using the Courier font, 24 point. The fill is the color of the text we want printed.
# NOTICE: create_text's x,y coordinates are the very CENTER of the text!
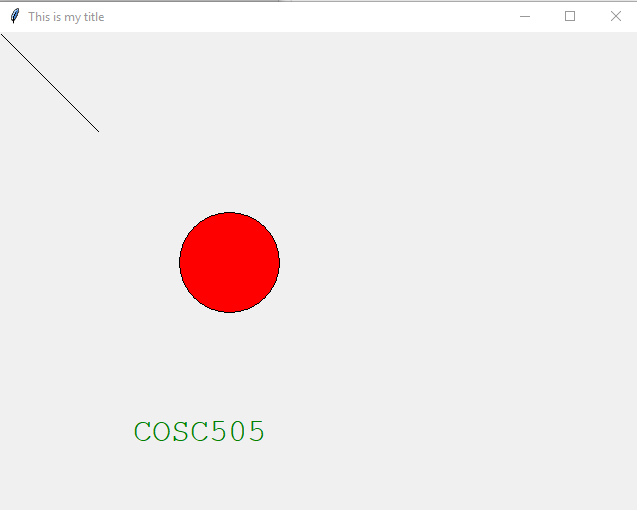
canvas.create_text(200, 400, font=("Courier", 24), fill="green", text="COSC505", tags="mytext", anchor="center")
In the code above, we specify the x, y coordinates which will be linked to the anchor. We specified the anchor be center, which means that the x, y coordinates will be the center of the text. We also specified the font to be a 24 point, courier-type font. We can also specify what color we want to draw the font using the color parameter. Finally, the text is specified using the text parameter. In our case, this will be COSC505. The code above produces the following output:
Events
Sometimes it would be helpful for us to allow interactivity between the user and the screen. Sure we can draw to the screen, but it also would be nice if we could handle mouse clicks and so forth. We do this by handling events.
We bind events from a canvas to a function by using canvas.bind(), which has the following format:
def clicked(event):
    canvas.delete("mytext")
    mystring = "You clicked at " + str(event.x) + ", " + str(event.y)
    canvas.create_text(280, 400, font=("Courier", 24), fill="green", text=mystring, tags="mytext")

def double_clicked(event):
    # root.quit() will return from tk.mainloop() and run the sequence of commands afterward.
    root.quit()

# Bind the mouse button #1 to the clicked callback, defined above
canvas.bind("<Button-1>", clicked)
canvas.bind("<Double-1>", double_clicked)

# Let TK handle events. After we run mainloop, the only way to run code is to handle events!
tk.mainloop()
Unfortunately, the event is a bit esoteric, such as <Button-1>, but you can see that the bind function will bind an event name to a function. Every time we press Button-1 (left mouse button), the function clicked will be called and passed the event. Events are handled automatically by Tkinter after you (the programmer) calls mainloop(). This loop performs event handling and routes events to your functions that you created using bind.
Binding Events
The following events can be bound:
| Event | Description |
|---|---|
| <Button-1> | Left mouse button was pressed. |
| <Button-2> | Middle mouse button (or wheel) was pressed. |
| <Button-3> | Right mouse button was pressed. |
| <Button-4> | Mouse wheel scrolled upward. |
| <Button-5> | Mouse wheel scrolled downward. |
| <Double-X> | Same as above except accepted as a double click. |
| <Motion> | The mouse moved. The event object contains the coordinates. |
| <B1-Motion> | Mouse moved with the left mouse button pressed. |
| <Key> | Any key was pressed on the keyboard. |
| a, b, c, ..., A, B, C, ... | A specific key was pressed, such as, a, b, A, B, etc. |
| <ButtonRelease> | Any mouse button was released. |
| 1, 2, 3..., *, &, ^ | A specific key with symbols was pressed. |
Example
import tkinter as tk
import random

# Specify a list of colors our rectangles can be
colors = ["red", "green", "blue", "cyan", "orange", "magenta", "black"]

# Create the root, give it a title, and then link it to a Canvas
root = tk.Tk()
root.title("This is my title")
canvas = tk.Canvas(root, width=640, height=800)
canvas.pack()

# The callback for mouse motion with<Button 1>pressed. Only draw to the screen if button 1 is pressed.
def mouse_draw(event):
    color = colors[random.randint(0, len(colors)-1)]
    upper_left = (event.x - 5, event.y - 5)
    bottom_right = (event.x + 5, event.y + 5)
    canvas.create_rectangle(upper_left[0], upper_left[1], bottom_right[0], bottom_right[1], fill=color)

# Quit event when the user double clicks the Canvas
def quit(event):
    root.quit()

canvas.bind("<B1-Motion>", mouse_draw)
canvas.bind("<Double-1>", quit)

# Start the mainloop so that tk can handle events
tk.mainloop()

# We get here after root.quit(), but nothing is to be done, so just exit.
Our program above creates a canvas and draws when the mouse is moved with the left mouse button down. Otherwise, nothing happens. If we double click the left mouse button, the program quits. Notice that root.quit() will break the mainloop(). The code above produced the following example:
